While organizing photos on my computer, WHAM! …suddenly my persistently nagging craving for cheese hits me. Guess that’s what happens when one looks at pictures of cheese while hungry? Cheese is one of those few foods that I can never really get sick of consuming. I recall reading an article on either Huffington Post, Elite Daily, or Buzzfeed about how cheese can be addicting because of how it’s processed, how the aging process creates chemicals that bind to brain receptors that (long story short) are associated with satisfaction, pleasure, even addiction. I haven’t delved into the science behind this since, although I’m convinced that fat molecules also have a role with why cheeses are addicting foods that make most people happy.
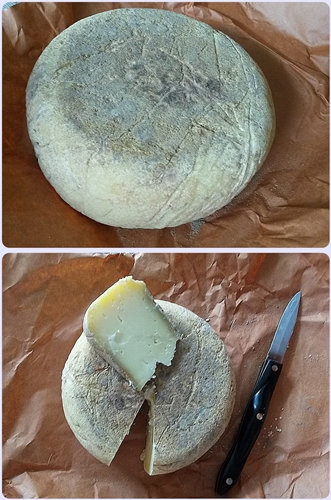
Anyway, I posted last year about a cheese wheel that I made back in April 2015: I finally picked up this cheese wheel from this quaint farm in August, around a month after the wheel was taken out of the cave. It was a tasty sheep’s milk cheese wheel, one that I slowly consumed over the next few months.

This cheese really tasted like happiness: maybe I’m biased because of the labor and time I invested into this 2kg present-to-self. My favorite cheeses also happen to be semi-soft or made from sheep’s milk – this wheel was both, aged 90 days as well.
For sure, I intended to use some of this wheel to make homemade macaroni and cheese. I made macaroni and cheese from scratch a few times while I lived in Queens and really wanted to prepare this dish while I was in NJ, but for many reasons I never made the time to do so…until Thanksgiving 2015, 3+ months after I picked up my cheese wheel. By November I still had around half of my cheese wheel left.
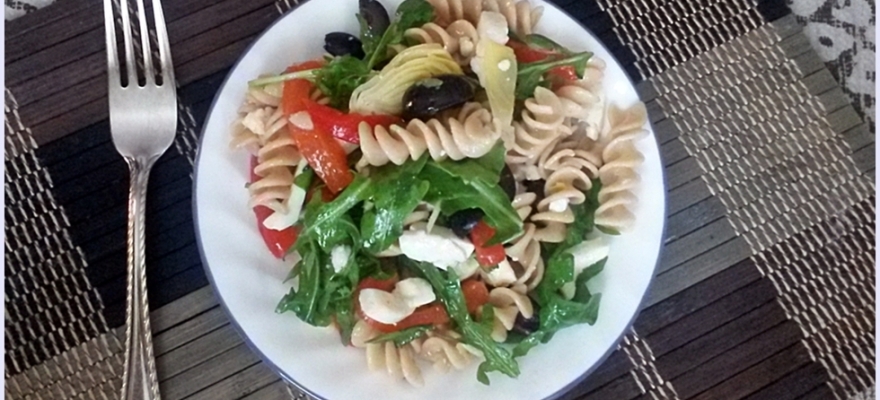
I was eager to make macaroni and cheese, but this dish is also convenient to prepare a few days before an event, over the course of a few days if one cannot do everything beforehand. Normally I’m content simply eating macaroni and cheese straight from the pot where the pasta and cheese sauce were combined, but for the holidays I wanted to bake a macaroni and cheese, make it special. I otherwise kept this macaroni and cheese simple but I also like mixing other ingredients in with the cheese sauce and pasta – this recent post was an example of what I typically like to add, except I replaced pasta with quinoa.
Ingredients:
60g flour
60g butter
1 quart whole milk (946mL), room temperature
300g shredded cheese (I used the rest of my cheese wheel and made up the difference in weight with aged Manchego)
couple pinches of paprika
1lb pasta
salt and pepper to taste
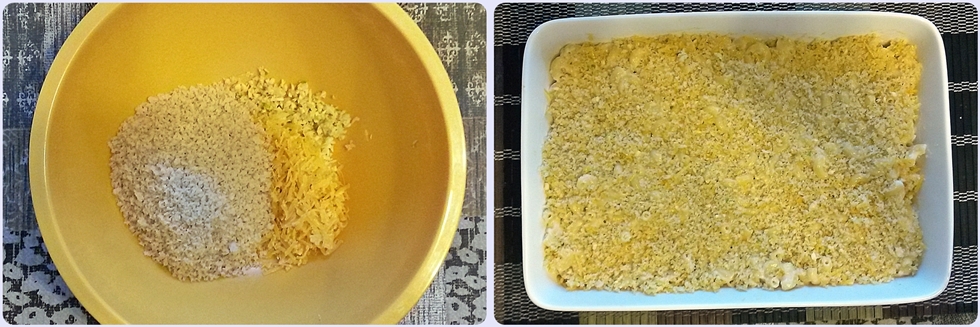
For the topping:
1 cup Panko bread crumbs
3-4 T sharp cheese (I used an aged gouda cheese)
2 garlic cloves
olive oil
 1) Shred 300g of cheese. A bit more or a bit less is acceptable, but I find that for a quart of milk, this amount of cheese can make a flavorful and relatively fluid cheese sauce that works for macaroni and cheese. I shredded all of my cheese wheel plus some Manchego cheese. Some part of this cheese mixture should consist of a cheese that melts easily: I like Fontina as it is a semi-soft, almost buttery cheese that does not have a strong taste, allowing the flavors of other cheeses (eg. Gruyere or Cheddar) to stand out. In general, there are infinite combinations of cheeses that can be used to make a homemade cheese sauce, but fresh cheeses with notable water content (eg. fresh mozzarella cheese) will not melt as well.

So much shredded cheese!
My cheese wheel and the Manchego cheese both have mild but discernible tastes. More importantly, these cheeses are hard enough to shred and contain enough fat to evenly melt and disperse in a cheese sauce. (Fontina is a bit more cumbersome to shred since it is quite soft.)
2) Make a roux: start by melting the butter over medium-low heat. When the butter is almost completely melted, add the flour and constantly stir this mixture. This mixture will slowly but surely become less of a lumpy mass and start resembling a caramel sauce. My best rouxs have been made in an aluminum pan, not a stainless steel pan and definitely not in a Teflon-coated or cast iron pan.

Roux progression
3) Make a bechamel sauce using the roux: the key to making a bechamel sauce is to add the milk in stages after completing the roux. Slowly add a little milk to the roux, assuring that all the milk has been fully incorporated prior to each new addition of milk by stirring vigorously after each addition.
I added my milk in 7 or 8 installments, a heavy 1/2 c at a time. At first, this mixture will look really lumpy. Even when almost half of the milk is added to the roux, it will seem like this mixture will not thin out. My bechamel sauce started to thin out after 2/3 of the milk was added, but a few lumps still remained.
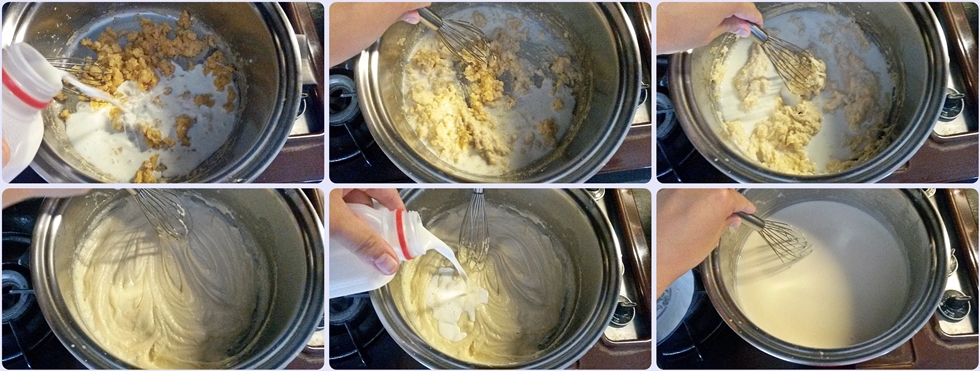
Bechamel sauce progression
After all the milk is added to the pot, cook this mixture for an additional 5-10 minutes, constantly stirring and regularly scraping the sides and bottom of the pot to make sure the sauce does not stick. This sauce may start to boil, in which case one should lower the heat. For sure, this sauce will continue to thicken. The bechamel sauce is done once it is thick enough to coat a stirring utensil and one can run a clean finger through the sauce without the resulting line immediately disappearing, like in the picture below.

Finished bechamel sauce
4) Make a cheese sauce using the bechamel sauce: add the previously-shredded cheese to the bechamel. I’ve not had problems stirring in all the cheese at once. Continue to stir until all the cheese melted.
Add 1-2 pinches of paprika. I like paprika since it adds a hint of smokiness and pungency that complements dairy well. Nutmeg is another good spice to add to a bechamel sauce for similar reasons. Herbs like rosemary and thyme can also be used to enhance the taste and appearance of a homemade cheese sauce.
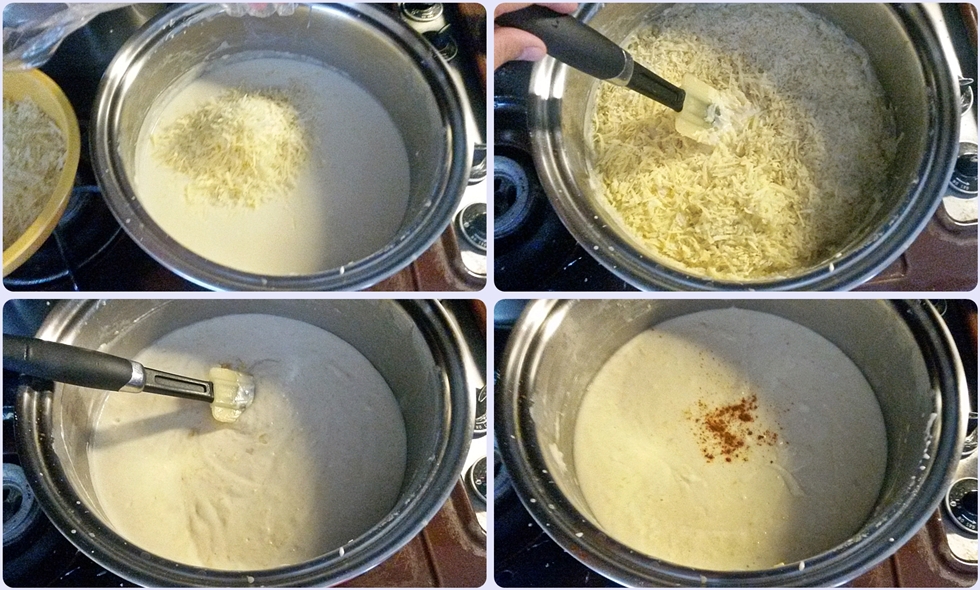
Homemade cheese sauce

5) Cook the pasta until it is not quite al dente since the pasta will still cook a bit in the hot cheese sauce and in the oven. After straining the pasta, running it under cold water helps cease further carry-over cooking (for me, this is until the pasta stops releasing steam into the air).
I started heating water around the same time I started making my roux and finally started cooking pasta when the water started to boil, around the time when I started adding cheese to my finished bechamel sauce.
6) Add the cooked pasta to the hot cheese sauce and gently combine everything together. Sometimes, I’d mix in broccoli, ham, chicken, brussel sprouts, asparagus, beef, tomato, any combination of meats and vegetables at this point as well. If I serve this straight from the pot, I would stir this over medium heat and finish cooking the pasta in the cheese sauce. For this macaroni and cheese, since I wanted to bake this, I combined everything over low heat to keep the cheese sauce hot and fluid before pouring everything into a large, oiled casserole dish.

At this point, I cooled the macaroni and cheese until the casserole dish was not warm to the touch. This cooled dish was then covered (I used foil but plastic wrap is fine also) and placed in the refrigerator to be baked just before Thanksgiving dinner.
…
7) For a baked macaroni and cheese, preheat the oven to 375F and make the topping prior to baking. Mix together the bread crumbs, cheese, and garlic, adding enough olive oil until everything was just moistened and evenly combined. Distribute this topping evenly over the macaroni and bake until the topping starts to brown.
To be honest, I didn’t time this exactly, but I took out the casserole dish within a half hour – it’s weird to say, but this macaroni and cheese smelled done because the aroma of baked cheese and bread permeated the kitchen.
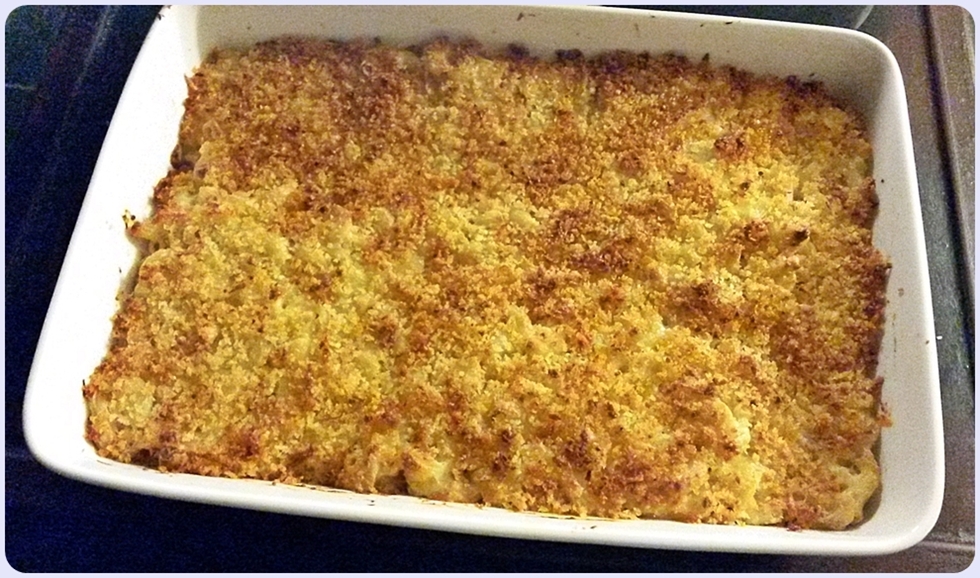
Definitely best served warm, but this made great leftovers for the days to come. The above picture won’t show this, but not only did the garlic not burn while baking, but they sort of caramelized!

Macaroni and cheese is one of my favorite American comfort foods but I also view this as a great template for a complete dinner, one that allows for easy incorporation of other ingredients. Of course, macaroni and cheese is also a safe bet for a carbohydrate dish that everyone would like at the dinner table. While there are numerous macaroni and cheese products available at a supermarket today, a homemade macaroni and cheese is truly a crowd-pleasing labor of love!